Reolink Go PT Review
Do you get sunlight? Do you have a cell signal? Then you can have live remote video feed from a camera that can pan and tilt 360 degrees. Not to mention the other features common with Reolink cameras like of motion recording and good night vision video. This is the Reolink Go PT.
All my previous Reolink experience has been with some of their PoE (power over ethernet) security cameras, which have been a great addition to my house. I caught my neighbor's A/C unit being stolen the first month I had them up and a number of other alley prowlers. I have used the Reolink app on my phone and computer extensively over the last 6 months since getting those cameras. I had never used any of the cameras powered by solar or with the pan and tilt capabilities until now though.
Our family has a 200 acre farm in the Texas Panhandle, which none of us live at. The closest family member is 20 minutes away and the furthest is about 10 hours. While there is a non family member living there, we all wanted a way to check in on the farm and to record anyone who might drive up to the house. The house is over half a mile from the paved highway on a hilltop. This camera gave us the capability to easily do just that.
Unboxing
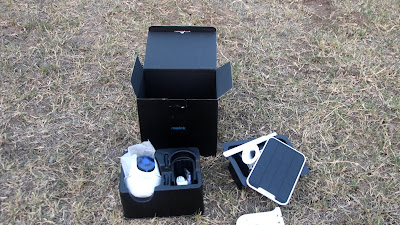
The camera and solar panel come together in the same box with accessories you need to get it mounted. The solar panel comes with a sturdy 3 screw mount, which can be angled any way need to catch sunlight. The cable attached to the solar panel has pretty good length (4 meters or 12 feet), so if you need to mount 5 feet away it would not be an issue. There are also extension cables available on the Reolink site. I mounted mine about 6 inches away from the camera. The screws are included in the kit.
Under the solar panel is the camera and its mounting hardware. Along with the mounting bracket is a strap, if you wanted to mount the camera to a tree. One thing you will notice immediately is how sturdy the camera feels and how well it is sealed up for weather.

Install
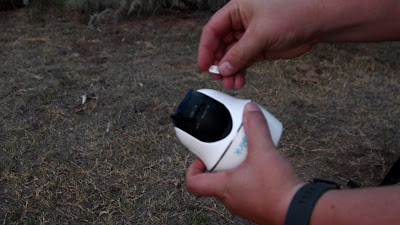
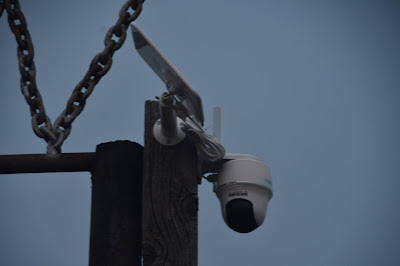
I mounted my camera with the solar panel up on a pole about 9 feet off the ground. I screwed both brackets into place and then proceeded to mount the solar panel and camera. Before putting the camera up though, I took my verizon sim card and placed it in the camera. My nano-sim card came from my Verizon Jetpack, which only cost $10 a month when added to certain Verizon Unlimited plans. It gives you 15gb of 4g data, which is more than enough with this camera. With just occasional live viewing and downloading videos, it is more than enough data. The nano-sim card has to be pushed pretty far in to click into to place, so you will need a point object to aid getting it in there.
After getting the sim card in, you will need to power up the camera to sync it to your Reolink app. You will have to setup a password for the camera and you will be done (assuming you are a previous Reolink user with an account already set up). After completing the app setup, all you need is to attach the solar panel cable and slide the weather seal protector into place after mounting the camera. Camera is ready to use at that point.
Using the camera
First thing I noticed was how quickly the camera responded to the pan command from my phone. While the video has a small delay, the camera starts to pan once you move it on your phone. The video delay is only about half a second when using the app on my computer The pan speed is good and quick, but not too fast that it blurs out completely. It is your the right speed. Having dealt with the slow pan speeds of IP cameras that I used in the past, this was nice to see it doesn't take 30 seconds to turn 360 degrees. I timed it at 15 seconds for a full 360 degree spin.
Second thing I notice was the great video quality and sound. You feel like you are right there when watch the live feed. Where I mounted my camera I had 4 bars of 4G verizon service, so it handles the live feed great. It is always windy here in the TX Panhandle and having the camera out in the open was something I worried about. While you can hear the wind through the video on windy days, it is really not bad. It picks up audio really well. With where I have the camera the 2 way audio is not something I will use, but the siren could come in handy at some point. Both the videos below were captured with the motion detection.
The only issue I have had so far is a codec issue with the video when I go to edit in CyberLink Video editing program. The video files play fine, it just wont let me edit them at the moment. I am sure it is something I can solve eventually.
If you need a remote camera that can pan and tilt and will be in an area with cell service, this is a camera worth your consideration. For more information on the Go PT or to buy your own, head on over to the Reolink website. Retail cost is $289.99.
If you have any questions about the Reolink Go PT, just let me know in the comments.


